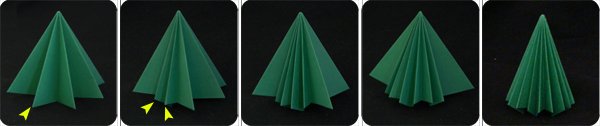

The 16 Sided Tree is made the same way as the 8-Sided Tree. the only difference is that each of the flaps of the 8-Sided Tree is squashed to make two more flaps. Thus the 8 flaps will become 16 flaps.
You can see the progression from 8-sided to 16 sided above, or detailed instrucitons below
Instructions for Origami 16-Sided Tree

Step 1:
Start with a square sheet of paper with the colored-side facing up. Fold and unfold along the diagonals to get an X-shaped crease.
|

Step 2:
Turn the paper over. Fold and unfold from left to right.
|

Step 3:
Fold in half (top to bottom).
|

Step 4:
Collapse into a Preliminary Base. To do this, push the top-left and top-right corners towards each other.
|

Step 5:
Allow the front to come up towards you.
|

Step 6:
Swivel the front flap towards the right. There should be an equivalent flap pointed back, swivel this one towards the left.
|

Step 7:
Make a Squash Fold. To do this, lift the top-left flap up towards.
|
 Press the corner down to squash it flat. |
 Try to squash evenly so the crease line is exactly in the middle and the left and right halves are of equal size.
|
 Turn the model over.
|

Step 8:
Repeat Squash Fold. Lift up the right flap. |

Squash down evenly.
|

Step 9:
Like turning the pages of a book, swivel the top-right flap towards the left. Behind the model, swivel one flap from the left-side to the right-side.
|

Step 10:
Repeat the Squash Fold: lift the right flap up…
|
 and press down evenly.
|

Step 11:
Repeat Squash Fold on the last flap.
|

Step 12:
The model should look like this. Like turning pages, swivel one flap from right to left (swivel left to right on the back side of the model).
|

Step 13:
The model looks a little like an upside down kite; we will make it look like a tree. Fold and unfold the bottom of the kite to get a crease line. |

Step 14:
Change the valley fold crease made above to a mountain fold. Tuck the flap of paper underneath the model.
|

Step 15:
Turn the model over and repeat.
|

Step 16:
Once that is done, turn the “pages” and repeat two more times so all lower flaps are hidden and the shape is like a triangle.
|
 If you wanted an 8-Sided Tree, you would stop here; otherwise, keep going. Step 17:
Lift the top-right flap towards you…
|
 and squash down.
|

Step 18:
Repeat the Squash Fold seven more times so all the flaps have been squashed to make a total of 16 flaps.
|

Step 19:
Flare open the layers to get a cone shape.
|
 Top view.
|

16 Sided Tree is done!
|
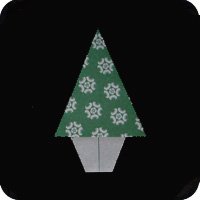
 Make a Lucky Star and glue it on top to make it a Christmas Tree.
|

If your paper is big enough, you can go further and squash the 16 flaps into 32 flaps. However there is a limit to how often you can divide each flap. First of all, it becomes increasingly difficult to make the flaps squash evenly so the peak of the tree tapers to a clean, sharp point. Secondly, the model becomes increasingly floppy as you manipulate the model more and more. For the most part, 16-sided is quite nice and good enough. Shown on the right is a 32-sided tree.
- see 16 Sided Tree as a diagram
- Christmas Origami
- Home Page
- Site Map
Watch video: