This star box has a unique look which appeals to many people. Instead of a square box with a lid, it is an open-ended box with a flared opening in the shape of a 4-pointed star. The box is not hard to make, but there are many steps. The good news is that many of the steps are “repeat on the other side” type of folds; so, there’s very few different moves.
Instructions for Origami Star Box

Step 1:
Start with a square sheet of paper with the colored-side facing up. |

Step 2:
Turn the paper over. Fold in half from left to right. Unfold. |

Step 3:
Fold the paper in half top to bottom. |

Step 4:
Push the left and right upper corners of the paper towards one another. |

The top layer of paper will come towards you. Watch the movement of the red dot to see how it works. |

Keep pushing the corners towards one another. |
 Swivel the flap of paper towards the right. There should be a similar flap of paper behind the model, swivel this one towards the left. |
 This structure is called a “preliminary base” and it is a common starting point to many origami models. |

Step 5:
Work with the top layers of paper only: fold the bottom-left and bottom-right edges of the paper towards the center to meet with the vertical crease line. |

Step 6:
You will do the “squash fold”. To do this, peel apart the two layers of paper. |

Step 7:
Ease open the layers of paper more. |
 Squash the top part down. Align the crease with the edges of the paper so the paper is evenly distributed and not skewed to one side. |

Step 8:
Repeat on the other side: peel open the two layers. |
 Ease open the paper more. |
 Squash down. Squash down. |

Step 9:
Turn the model over. |

Step 10:
Repeat steps 5 and 6 on this side of the model. Start by folding the left-edge and right-edge of the paper towards the central midline. |

Step 11:
Repeat the squash fold: peel open the layers of paper. |
 Ease apart the papers more. |
 Squash down. |
 This is how the model looks like. |

Step 12:
Swing the top-right flap of paper towards the left. At the same time, swing the back layer of paper (on the left side) towards the right. Turning one layer from the top of the model and one layer from the bottom of the model keeps the model evenly distributed. The move is a little like turning the pages of book. |

Step 13:
Fold the bottom-left and bottom-right edges of the paper towards the vertical midline. It should fold along an existing crease. |

Step 14:
Turn the model over. |

Step 15:
Repeat step 13. |

Step 16:
Fold the top section of the model down as shown. |
 Unfold. This section will be the base, or bottom, of the box. |

Step 17:
Fold up the pointy tip of the model as shown. You’re going to be doing this 4 times for the 4 sides of the box. |

Step 17a:
Turn the model over. |

Step 18:
Repeat: fold up the pointy tip of the model. |

Step 18a:
Like turning pages on a book, swing the right layer of paper towards the left. Similarly, swing the left layer (on back side of model) towards the right. You have just completed 2 iterations. Two more to go. |

Step 19:
Here, it is as if you are back to where you were before. Repeat as in the last 2 steps. |

Step 19a:
Turn the model over. Notice that there is only one more flap to fold up. |

Step 20:
Last time: fold pointy tip up. |
 This is how the model should look like. |

Step 21:
Rotate the model so it is perpendicular to the table. |

Step 22:
Pull apart the edges of the star box so the model opens up. |
 Keep pulling. |
 Even out the edges of the box and flare open the white flaps. |
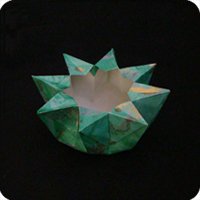
 star box is done! |
 Side view |
 
This star box can be used to hold candies, nuts, beads or other small items. You can also use it to store tooth picks and short items like crayons. Shown on the right-top is a star box filled with paper Lucky Stars.Shown on the right-center is star box made with harmony paper Right-bottom: You can also make make a star box variation with the sides tucked in. |