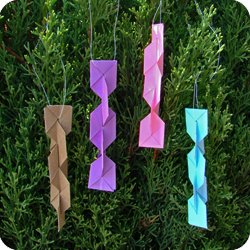
This Money Ornament ($ Ornament) is made with two one-dollar bills. It is an easy model which can be used as a decoration or as a toy.
As a decoration, you will need a clever way to attach a thread to the ornament. Do not puncture a hole with needle & thread because it is illegal to deface a US money.
As a toy, hold the apex of the model in between your thumb and forefinger. Gently blow at the model and it will spin. A similar model was created by A Pidel called Spinner and AJ Moreno called Flying Color Mixer.
Instructions for Money Ornament

Step 1:
Start with a crisp dollar bill with the black-side facing up.
|

Step 2:
Fold and unfold the dollar bill in half crosswise.
|

Step 3:
Fold down the left-side and right-side of the dollar bill so the top-edges meet at the center crease made above.
|

Step 4:
Unfold |

Step 5:
Perform a Reverse Fold.
|
 Next, fold the right side of the dollar bill towards the left.
|
 Use the existing creases as a guide. Some of the creases will need to switch from mountain fold to valley folds.
|
 When the creases are in place, squash down flat.
|

Step 6:
Repeat the Reverse Fold on the back side of the model.
|

Step 7:
Like turning the pages of a book, turn the top-left layer to the right.
|

Step 8:
Fold up the bottom-left side of the model. |

Step 9:
Repeat on the right side: fold up the bottom-right side of the model.
|
 Turn the model over and work on the back side.
|

Step 10:
Fold up the bottom-left side of the model.
|

Step 11:
Repeat one last time: fold up the bottom-right side of the model. |
 This “unit” is pretty much done. There should be 4 sections or “flaps”. Fold the flaps back and forth a little to re-enforce the creases. Arrange the flaps so the model becomes 3D with the 4 flaps extending away from each other like the letter X. Take another dollar bill and make a second unit like this one.
|
 Notice that each unit has two “tabs” and two “pockets”. The tabs of one unit will be inserted into the pocket of another unit. |
Assemble

Step 12:
Place two units side by side so the pockets and tabs point towards each other. Orient the units so the tabs of one unit faces the pocket of the second unit. Slide one into the other.
|
 As you slide the two units together, rotate the model and check the position of the other tabs and pockets. Make sure that all the tabs are sliding under a pocket. There should be 4 tab/pocket pairs.
|
 This is how it looks like when the two units are assembled. |
  
Three views of the Money Ornament. |
 The money ornament will look like the one on the right if you had started with the green-side of the dollar bill facing up. |