Does money grow on trees? With this Money Leaf model, it sure looks like it! This dollar bill origami model is not very hard yet it makes a dazzling leaf which will impress friends and family.
Instructions for Money Leaf

Step 1:
Start with a crisp dollar bill with the black-side of the bill facing up. |

Step 2:
Fold/unfold the model in half. |

Step 3:
Fold/unfold each section in half to get eighth divisions. |

Step 4:
Compress the dollar bill as you fold the model in half as shown. |

Step 5:
Turn the model over. |

Step 6:
Pleating is not always even. Look at your model and establish which is the shorter side of the leaf. |

Step 7:
Compress the leaf to establish the creases. |

Step 8:
Hold steady the tip of the model (green arrow head) and flare open the rest of the leaf. |
 Money Leaf is done! This side of the model has the white border along the base of the leaf.
|
 This is the other side of the model. Both sides looks good and it’s up to you to decide which is the “front” of the leaf.
|
   
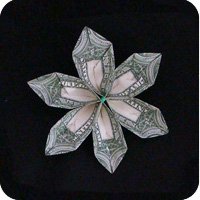
These leaves were made with more pleats. Instead of folding the dollar bill into 8 sections (step 3), it was divided into 16 sections. The leaf looks a little nicer: notice the extra folds radiating from the base of the leaf. |