Learn to make an origami easy rabbit : it only takes about 5 minutes to make this paper bunny. At this pace, you will soon have your own colony of cute, origami rabbits.
   
|
This model can be made with no cutting, or with cutting. Both looks great, it all depends on your stance on the use of scissors in the art of origami. Some people think you should never (never, ever!) use scissors. In contrast, other more relaxed folders will say that a bit of cutting is OK if it improves the creative experience. Read more about Pure Origami here.
Instructions for Origami Easy Rabbit

Step 1:
Start with a square sheet of paper; orient it so it is in “diamond” position (balanced on one of its corners). Fold it in half (left to right) and unfold. |
|
Step 2:
Fold the bottom left-edge and bottom right-edge towards the center crease. This is called a kite base. |
|
Step 3:
Fold down the top-part of the kite so it looks like a triangle. |
|
Step 3:
Fold the flap back up at about 2/3 of the way. The protruding corner will be the bunny’s tail so make it as big or as small as you want. |
|
No Cutting Method of Easy RabbitStep 4:
Fold the model in half (left to right). |
|
Rotate a quarter turn clockwise. |
|
Step 5:
Fold up the skinny end of the model. Fold it about 1/3 of the length of the model. This will be the head and ears of the bunny so make it as big or as small as you like. |
|
Unfold. |


|
Step 6:
At the skinny end of the model, peel apart the layers of paper and re-fold along the crease made in step 5. Press head/ears down flat. |


|
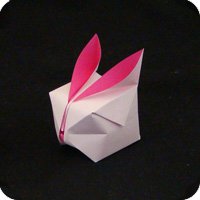
Easy rabbit is done!
At this point, you have some options. You can draw some eyes. A cool effect is to run your fingernail along the bottom of the model to trace out an arc. Then fold the paper back (mountain fold) along the arc. This give the impression of front and back legs. Pretty classy for such a simple model. |

|
With Cutting MethodStep 4 with cut:
Cut the paper down the middle: start from the skinny side of the model and cut about 1/3 of the way. |
|
Step 5 with cut:
Fold the model in half (left to right). |
|
Rotate quarter turn clockwise. |
|
Step 6 with cut:
Peel back the cut sections of paper to make the head and ears of the bunny. |


|
Easy rabbit is pretty much done.
Again you have options: you can draw in eyes. You can curve the legs. You can shape the ears. The cut made in the paper allows the ears to be arranged in different ways. |


Pure Origami
In the old days, origami sometimes involved cutting the paper so the folding sequence is less complicated or, a cut is made so the model look more realistic. A small cut can make a big difference and in ancient Japan, this was acknowledged and well accepted. In particular, the famous 1797 book Senbazuru Orikata contained instructions to make interconnected cranes which required cutting the paper. This shows that back then, cutting was OK.
More recently, people have made rules and called it “Pure Origami”. In Pure Origami,
1. you start with a square sheet of paper (which should be white in color);
2. there should be no cutting or tearing;
3. there should be no glue, staples, or tape; and
4. once made, the model should not be drawn upon or decorated in any other way.
The concept of not cutting the paper is fairly new and was not a part of the original art of paper folding. People have now moved beyond the “single sheet of square paper” rule. Origami can be made with triangles, rectangles and even circles.
Watch video: